How to debug
如何调试代码?
我们在编写脚本函数的时候,是可以使用 ES7 的语法来编写代码的。这样可以让我们使用 async 和 await 语法。但是,在运行时候,为了兼容不同的浏览器,我们在发布脚本函数的时候,会将代码编译为 ES5 的语法。然而,我们编译后的 ES5 的代码是比较难进行问题定位的。
因此,为了更好的方便我们进行调试,我们可以开启特殊的一种调试模式,让我们的浏览器在调试运行时加载的还是 ES7 的代码。
举例说明,我们给报销单(Reimburse) 建立了一个脚本(触发时机为新增)并且发布了。
thisApp.formOnLoad = async (ctx) => {
    const form = ctx.getFormContext().form;
    console.log('form onload');
};
回到产品中,新建一个报销单。等报销单表单显示出来后,进入浏览器的开发工具。
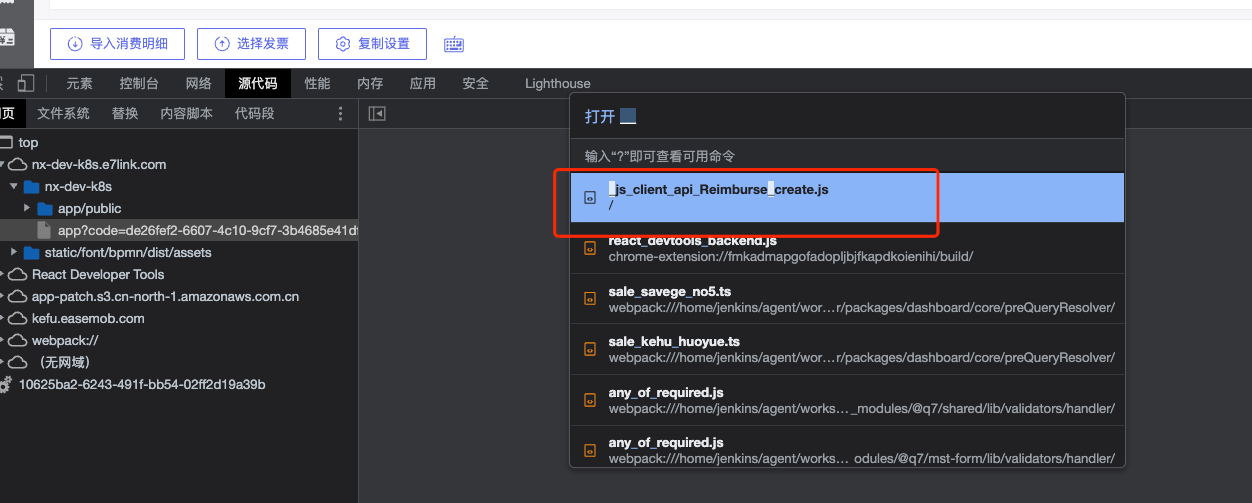
可以在源代码通过 _js_client_api_Reimburse_create 找到我们启用的脚本文件。脚本文件的命名格式是:_js_client_api_<对象名称>_<触发时机>。
此时这个脚本文件编译成 ES5 的代码形式如下:
(function anonymous(qiqi,__debug__,console
) {

/*
AddOrUpdate
*/
const script0 = {};

(function(thisApp) {
// ---- BEGIN ----
function asyncGeneratorStep(gen, resolve, reject, _next, _throw, key, arg) { try { var info = gen[key](arg); var value = info.value; } catch (error) { reject(error); return; } if (info.done) { resolve(value); } else { Promise.resolve(value).then(_next, _throw); } }

function _asyncToGenerator(fn) { return function () { var self = this, args = arguments; return new Promise(function (resolve, reject) { var gen = fn.apply(self, args); function _next(value) { asyncGeneratorStep(gen, resolve, reject, _next, _throw, "next", value); } function _throw(err) { asyncGeneratorStep(gen, resolve, reject, _next, _throw, "throw", err); } _next(undefined); }); }; }

thisApp.formOnLoad = /*#__PURE__*/function () {
  var _ref = _asyncToGenerator( /*#__PURE__*/regeneratorRuntime.mark(function _callee(ctx) {
    var form;
    return regeneratorRuntime.wrap(function _callee$(_context) {
      while (1) {
        switch (_context.prev = _context.next) {
          case 0:
            form = ctx.getFormContext().form;
            console.log('form onload');

          case 2:
          case "end":
            return _context.stop();
        }
      }
    }, _callee);
  }));

  return function (_x) {
    return _ref.apply(this, arguments);
  };
}();
// ---- END ----
})(script0);


const formOnLoad = async function(context) {
    if (script0.formOnLoad) {
        await script0.formOnLoad(context)
    }
}
const fieldOnChanged = function(context) {
    if (script0.fieldOnChanged) {
        script0.fieldOnChanged(context)
    }
}
const subGridOnChanged = function(context) {
    if (script0.subGridOnChanged) {
        script0.subGridOnChanged(context)
    }
}
const subGridRowOnInit = function(context) {
    if (script0.subGridRowOnInit) {
        script0.subGridRowOnInit(context)
    }
}
const onSave = async function(context) {
    if (script0.onSave) {
        await script0.onSave(context)
    }
}

return {
    formOnLoad,
    fieldOnChanged,
    subGridOnChanged,
    subGridRowOnInit,
    onSave,
};
//# sourceURL=_js_client_api_Reimburse_create.js

})
可以看到,编译后的代码和我们发布之前的代码有着非常大的差别。为了更好的帮助我们进行代码调试,这里有一个小技巧。让我们在浏览器的开发工具中切换到控制台,然后在控制台输入下面的命令:
window.__debug_jsf__ = true
让我们重新新增一个报销单,这次我们同样在源代码中打开这个 _js_client_api_Reimburse_create 文件。这时候的代码形式是下面这样:
(function anonymous(qiqi,__debug__,console
) {

/*
AddOrUpdate
*/
const script0 = {};

(function(thisApp) {
// ---- BEGIN ----
thisApp.formOnLoad = async (ctx) => {
    const form = ctx.getFormContext().form;
    console.log('form onload');
};
// ---- END ----
})(script0);


const formOnLoad = async function(context) {
    if (script0.formOnLoad) {
        await script0.formOnLoad(context)
    }
}
const fieldOnChanged = function(context) {
    if (script0.fieldOnChanged) {
        script0.fieldOnChanged(context)
    }
}
const subGridOnChanged = function(context) {
    if (script0.subGridOnChanged) {
        script0.subGridOnChanged(context)
    }
}
const subGridRowOnInit = function(context) {
    if (script0.subGridRowOnInit) {
        script0.subGridRowOnInit(context)
    }
}
const onSave = async function(context) {
    if (script0.onSave) {
        await script0.onSave(context)
    }
}

return {
    formOnLoad,
    fieldOnChanged,
    subGridOnChanged,
    subGridRowOnInit,
    onSave,
};
//# sourceURL=_js_client_api_Reimburse_create.js

})
OK,现在我们可以愉快的进行调试了。